You probably know this vegetable by the name of Kohlrabi or the 'Cabbage Turnip'. Whichever name you call the Noolkol vegetable, its wholesome goodness and culinary versatility make it a wonderful addition to dishes everywhere. To top it all, this wonderful vegetable is rather easy to grow and very rewarding to harvest & use once it grows fully!
Buy Noolkol Seeds
Whether you've just started out with your vegetable garden or are looking to make some new additions to your existing one, you definitely won't regret planting the Noolkol. But of course, it is essential to know how to go about it first.
This blog will tell you everything you need to know about the vegetable, from its benefits and growing Kohlrabi to how to incorporate it in your diet. So, let's get into it!
• Benefits of Noolkol: What Does Growing Kohlrabi Bring You?

There is no doubt that growing vegetables in your home garden is a very rewarding endeavor. But what more does growing Noolkol bring you? Here are a few of its major benefits that will make you yearn for a great Kohlrabi harvest!
1. Rich in Nutrients
Noolkol is packed with essential nutrients like vitamin C, vitamin B6, potassium, and fiber. It’s low in calories, making it a great addition to a healthy diet.
2. Aids Digestion
The high fiber content in Noolkol aids digestion and promotes a healthy gut. Regular consumption can even help prevent constipation and other digestive issues.
3. Boosts Immunity
Vitamin C is a powerful antioxidant found in abundance in Noolkol. It helps boost the immune system, protecting the body against infections and diseases.
4. Aids in Weight Management

Due to its low-calorie content and high fiber, Noolkol can help in weight management by keeping you full for longer periods, reducing the urge to snack on unhealthy foods.
Overall, it's the perfect vegetable! But how can you grow the best Kohlrabi variety in your home from seeds? Read on to know more.
• How to Grow Kohlrabi from Seed: Getting Started
Starting a vegetable plant from seeds can be pretty nerve-wracking if you don't know where to start. But if you know what you're doing even in just theory, you can start off strong! So, when starting your Noolkol seeds, here's what you must know:
1. Preparing the Soil

When germinating your seeds, it is essential to pick the right potting mix and the best thing for your seeds is Cocopeat! Cocopeat is made from coconut husk and is the perfect soilless mix for germinating seeds due to its airy and porous nature. It provides seeds with the perfect space for better drainage, aeration, and breathability.
When starting the seeds, if you are growing them indoors, remember to use seedling trays for better results as each seed will get enough space to grow and thrive, giving you higher germination rates.
2. Sowing the Seeds
Sow your Noolkol seeds directly into the garden or start them indoors 4-6 weeks before the last expected frost. If sowing directly, plant your seeds about 1/4 inch deep and space them 1-2 inches apart. If starting indoors, plant them in seed trays and keep them in a warm, sunny spot. The Kohlrabi germination temperature is between 18°C to 24°C, so ensure that the soil is kept warm during this period.
3. Watering and Caring for Seedlings

Keep the soil consistently moist but not waterlogged. Overwatering can lead to fungal issues, while underwatering can cause the seeds to dry out. Once the seedlings emerge, thin them out so that they are spaced about 6-8 inches apart. This spacing allows enough room for the bulbs to develop.
After your seeds have germinated and you start seeing some leaves, what's next?
• Kohlrabi Vegetable Growing and Caring: How to Care for the Mature Plant
Once the seeds have germinated and you've started seeing a few true leaves, it's time to take the next steps! Here's what you must know about some basic care requirements of the grown Noolkol plant:
1. Light and Temperature

Kohlrabi sun requirements include full sun to partial shade. Ensure that your plants receive at least 6 hours of sunlight daily. The ideal kohlrabi growing season is during the cool months of spring and fall, as the plants prefer temperatures between 40°F and 75°F (4°C to 24°C). Hot weather can cause the bulbs to become woody and tough, so avoid growing kohlrabi in the peak of summer.
2. Watering your Kohlrabi
Kohlrabi needs consistent moisture to grow well. So, water your plants regularly and ensure that the soil remains evenly moist. Mulching around the base of the plants can help retain moisture and keep the roots cool. Use a proper shower-head watering can to get enough water to all parts of your plant!
3. Fertilizing for Optimal Growth
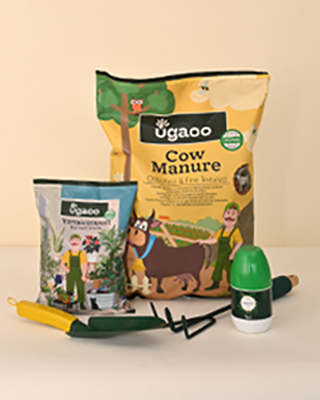
Feed your Noolkol plants with a balanced fertilizer or compost every few weeks to promote healthy growth. Avoid high nitrogen fertilizers, as they can lead to excessive leaf growth at the expense of the bulbs. What's best to use is an organic fertilizer that will give your plants the all-round and balanced nutrition they need. So, you can use Ugaoo's Organic Veggie Mix for the same, ensuring natural yet balanced nutrients for your Kohlrabi.
4. Pest and Disease Management
Kohlrabi is relatively resistant to pests, but it can still fall victim to common garden pests like aphids, cabbage worms, and flea beetles. So, to avoid any large-scale infestations, remember to regularly inspect your plants and use organic pest control methods if necessary. Also, practice crop rotation to prevent soil-borne diseases.
Some organic pest control to use - Insecticidal soap, Neem Oil, Ugaoo's ready-to-use Neem Guard.
• Harvesting and Storing Your Kohlrabi
Now that you've grown your plant well, it's time to cut! Precision and cleanliness are key when you're harvesting any crop. So, remember to always use clean cutters or scissors.
Kohlrabi growing time varies depending on the variety, but most Noolkol plants are ready for harvest within 55-70 days after planting.
1. When to Harvest

Harvest the bulbs when they are about 2-3 inches in diameter. If left to grow larger, they may become tough and less flavorful. Use a sharp knife to cut the bulb from the base, leaving the leaves intact.
2. Storing your Harvest
After harvesting, Noolkol can be stored in the refrigerator for up to two weeks. The bulbs can also be blanched and frozen for long-term storage. If you have a root cellar, you can store the bulbs there for several months.
• Ways to Consume Noolkol or Kohlrabi
Noolkol is a versatile vegetable that can be used in various culinary dishes. Here are some delicious ways to enjoy your harvest:
1. Raw in Salads

The crisp texture and mild flavor of Noolkol make it perfect for salads. Simply peel and slice the bulbs thinly, and add them to your favorite salad mix.
2. Cooked in Stir-Fries
Noolkol can be sautéed or stir-fried with other vegetables for a quick and nutritious meal. Its texture holds up well to cooking, making it a great addition to any stir-fry.
3. Roasted as a Side Dish

Roast Noolkol in the oven with a drizzle of olive oil, salt, and pepper for a simple yet flavorful side dish. Roasting enhances its natural sweetness and brings out its nutty flavor.
4. Added to Soups and Stews
Noolkol can be diced and added to soups and stews, where it adds a hearty texture and absorbs the flavors of the broth.
5. Mashed or Pureed
For a unique twist, mash or puree Noolkol and serve it as a substitute for mashed potatoes. It’s a healthy and flavorful alternative that pairs well with a variety of dishes.
Now that you probably know more about the extent of this vegetable's versatility, which way will you be consuming it once you make your harvest? Well, whichever one you pick... you will not be disappointed!
Happy gardening!


